Remote verification of the Horus Player.
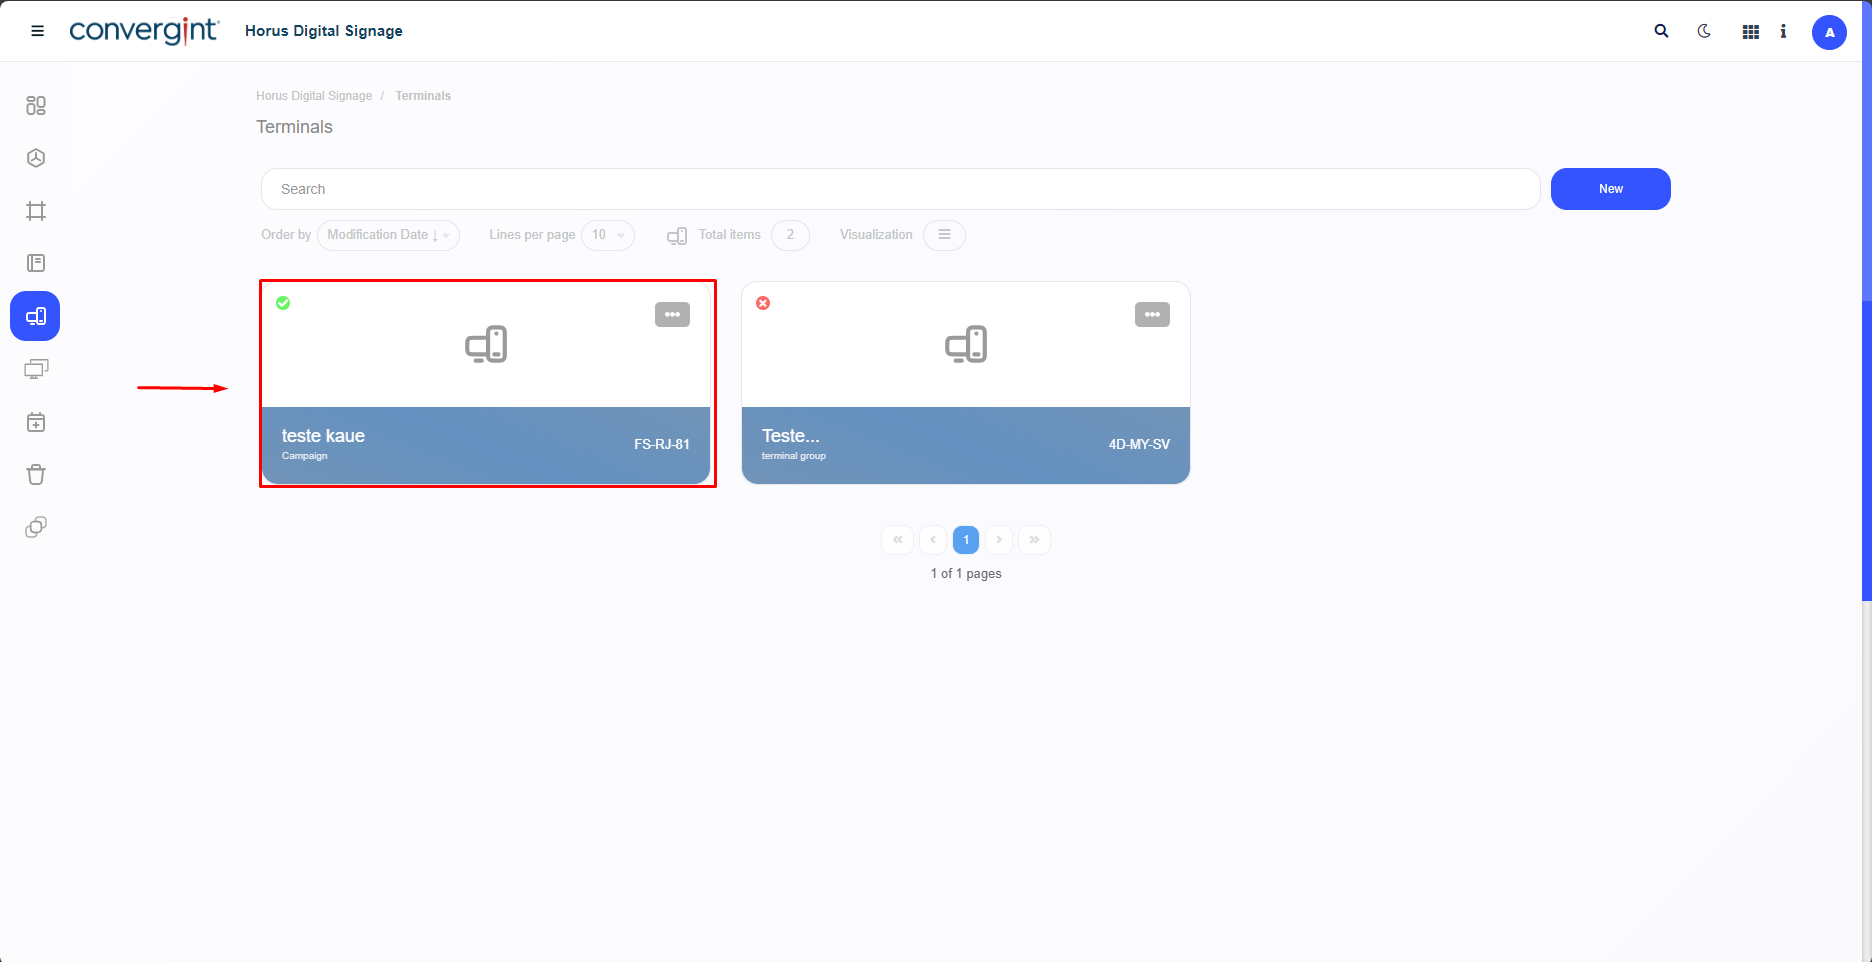
Following the above process, the Terminal will be created. To continue the process of making adjustments within the Terminal, depending on your preference, we will remotely check the server on which the Horus Player resides. This will give you detailed information about the machine running Horus Player, allow you to view the slide according to what is being displayed in the player and manage the history of actions and updates that have taken place in the player. The first step in remotely checking Horus Player is to access a previously created terminal in which you want to perform this check.
Note.: In order for the system to be able to include this functionality in the system, the Terminal you are using must be synchronized with the Player, and the native Horus Player machine must be turned on.
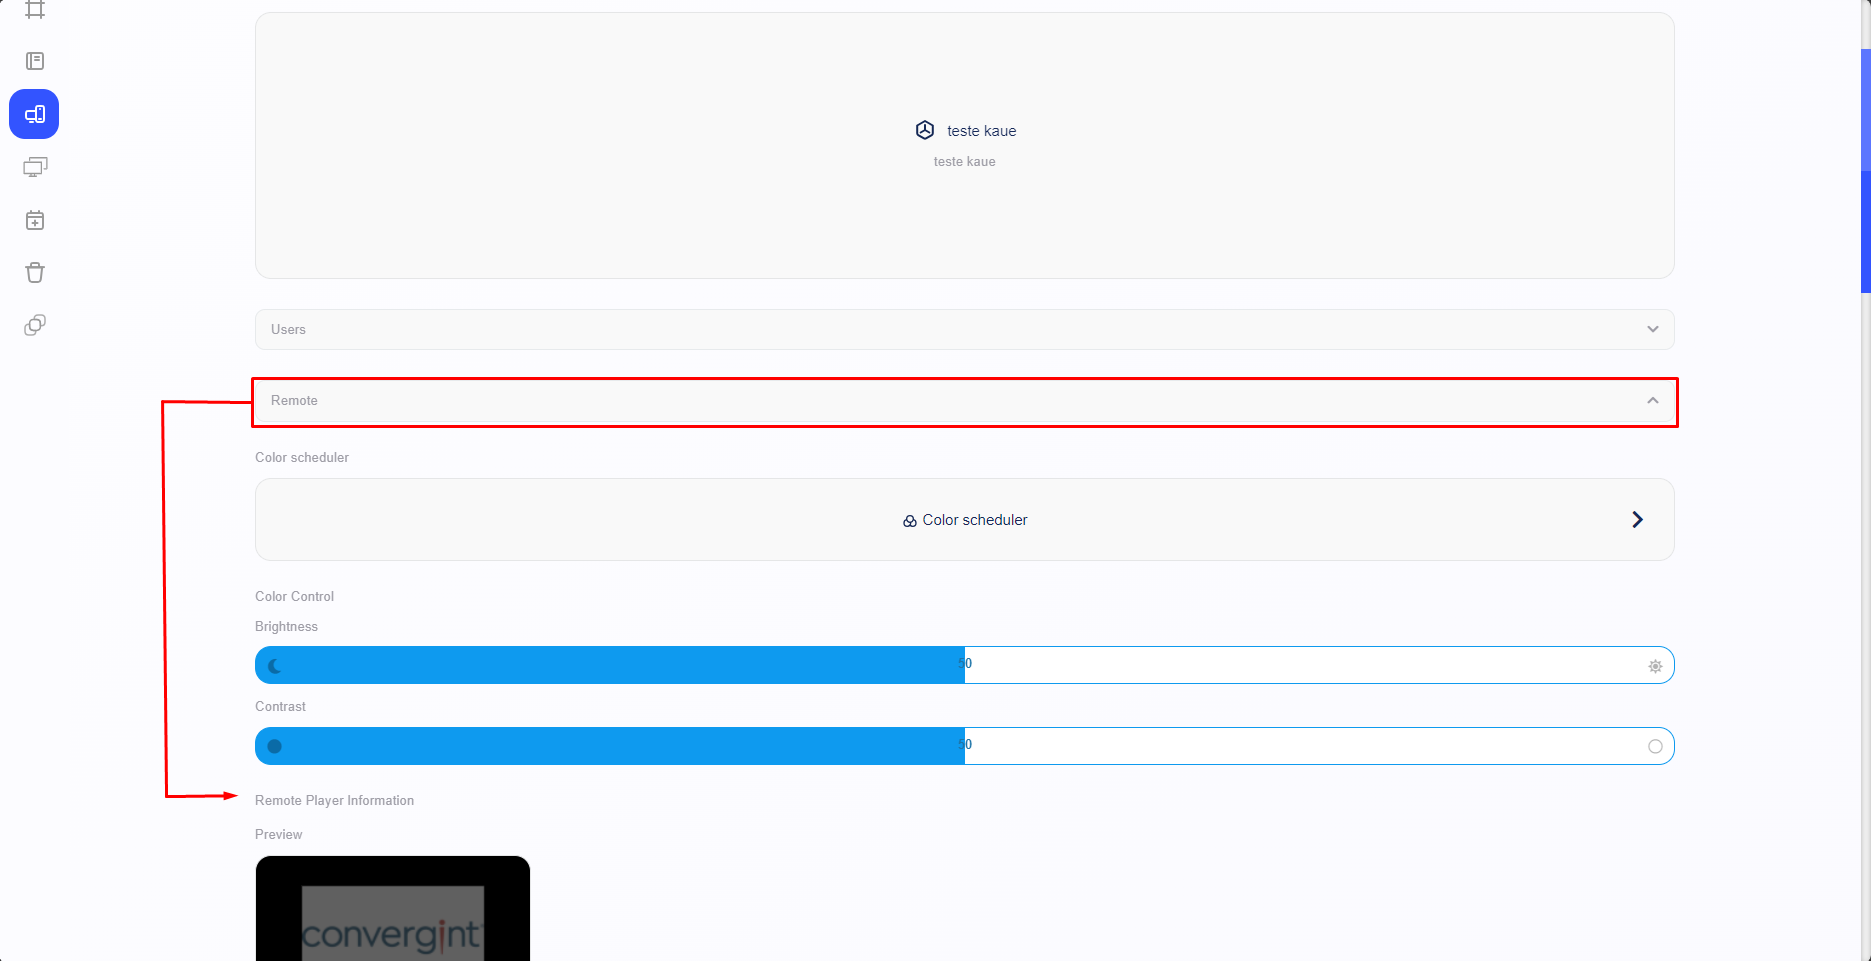
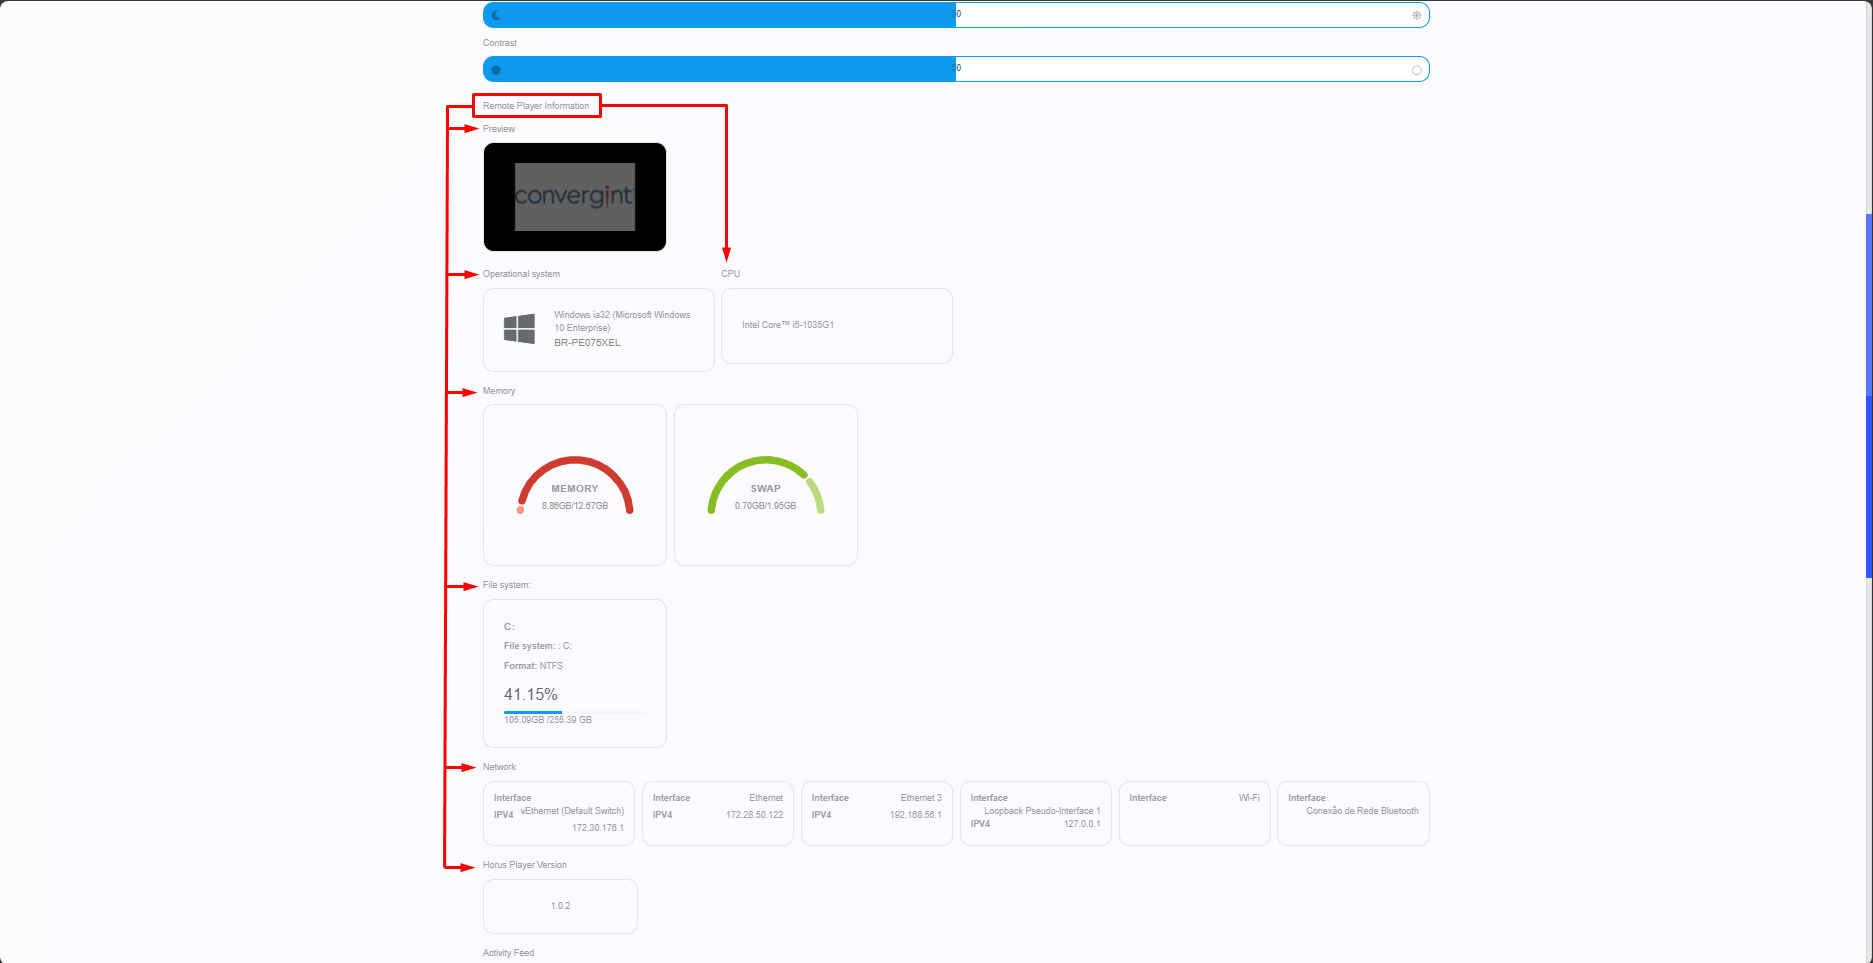
When you access a previously configured terminal, the system will display the Terminal interface, where you can remotely check Horus Player. To do this, simply access the “Remote” field. In this field, you can obtain detailed information about the machine on which the Horus Player resides in the “Remote Player Information” section, where you can view the slide preview, operating system, CPU, Memory, File System, Network, Horus Player Version, according to the machine running the Horus Player. This allows you to learn more about the machine on which the Player resides.
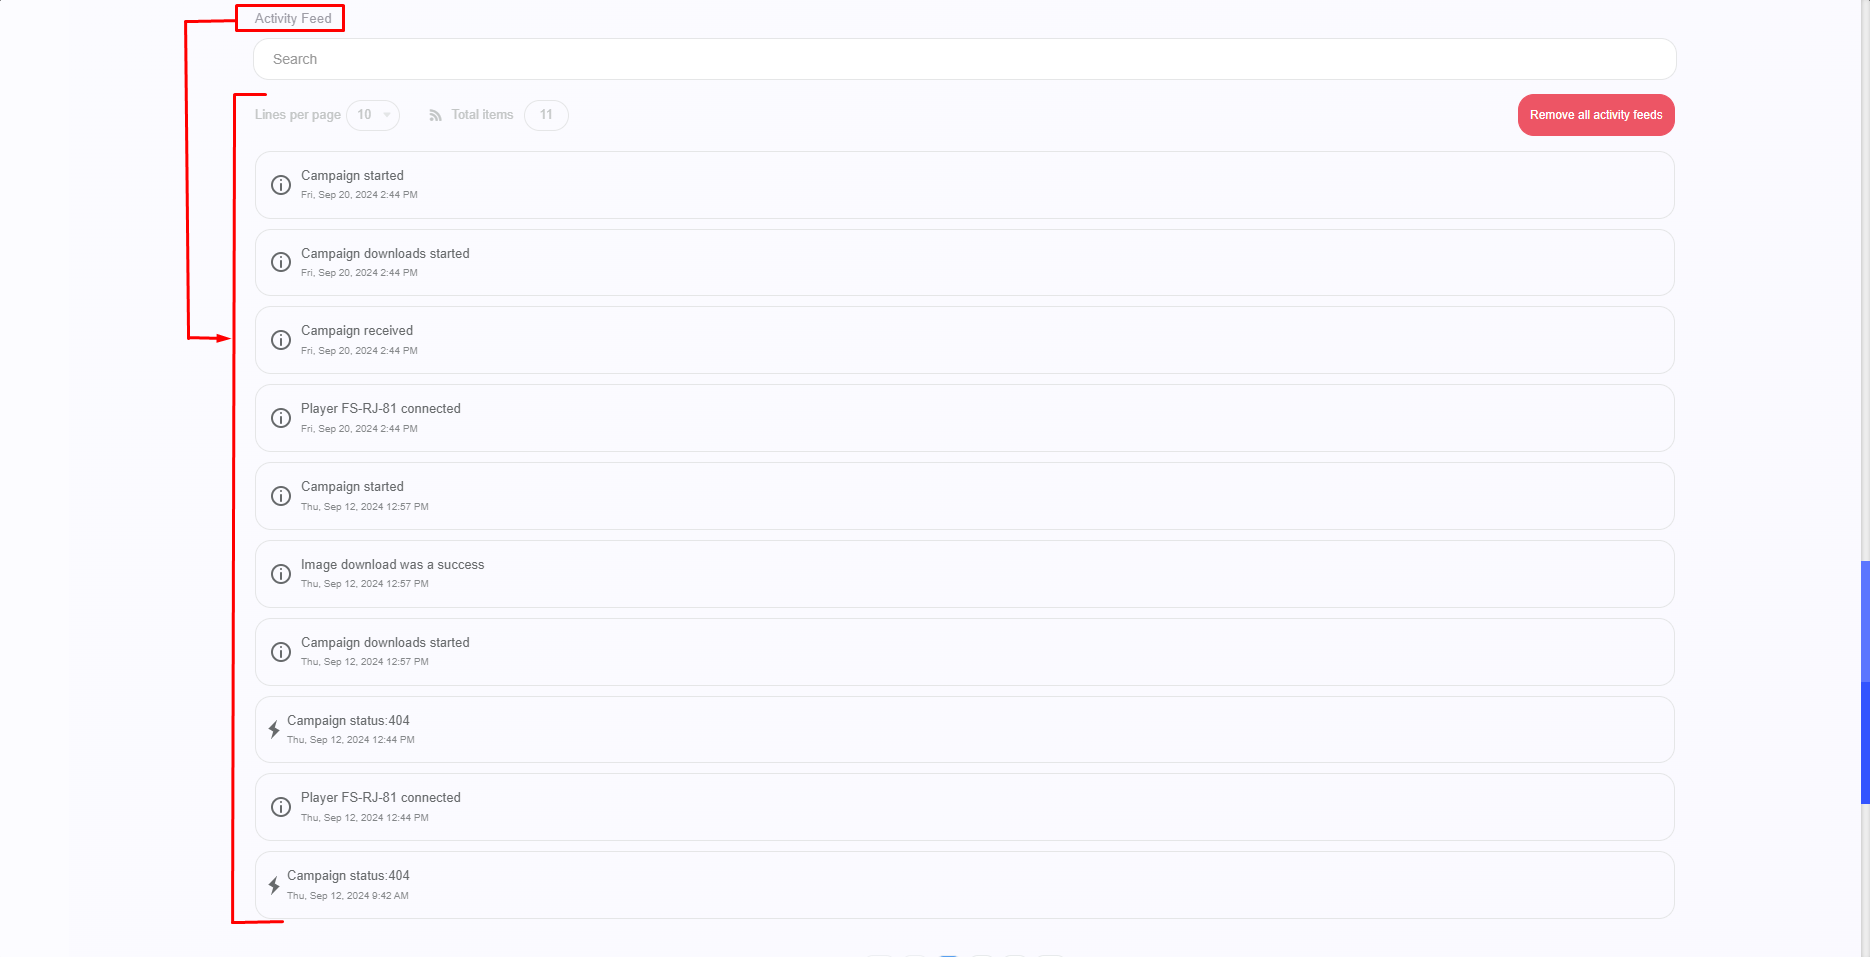
To manage the history of actions and updates that have taken place in the player, access the “Remote” field again, then access the “Activity Feed” section. In this section, the system allows you to manage and view actions that have taken place in the player, such as synchronizing actions with the player, downloading content within the slide, changing slides, according to the action included, among other various updates within the Horus Player, and it is possible to filter and remove actions. This allows for better management of actions related to the Horus Player.