Registering a Terminal
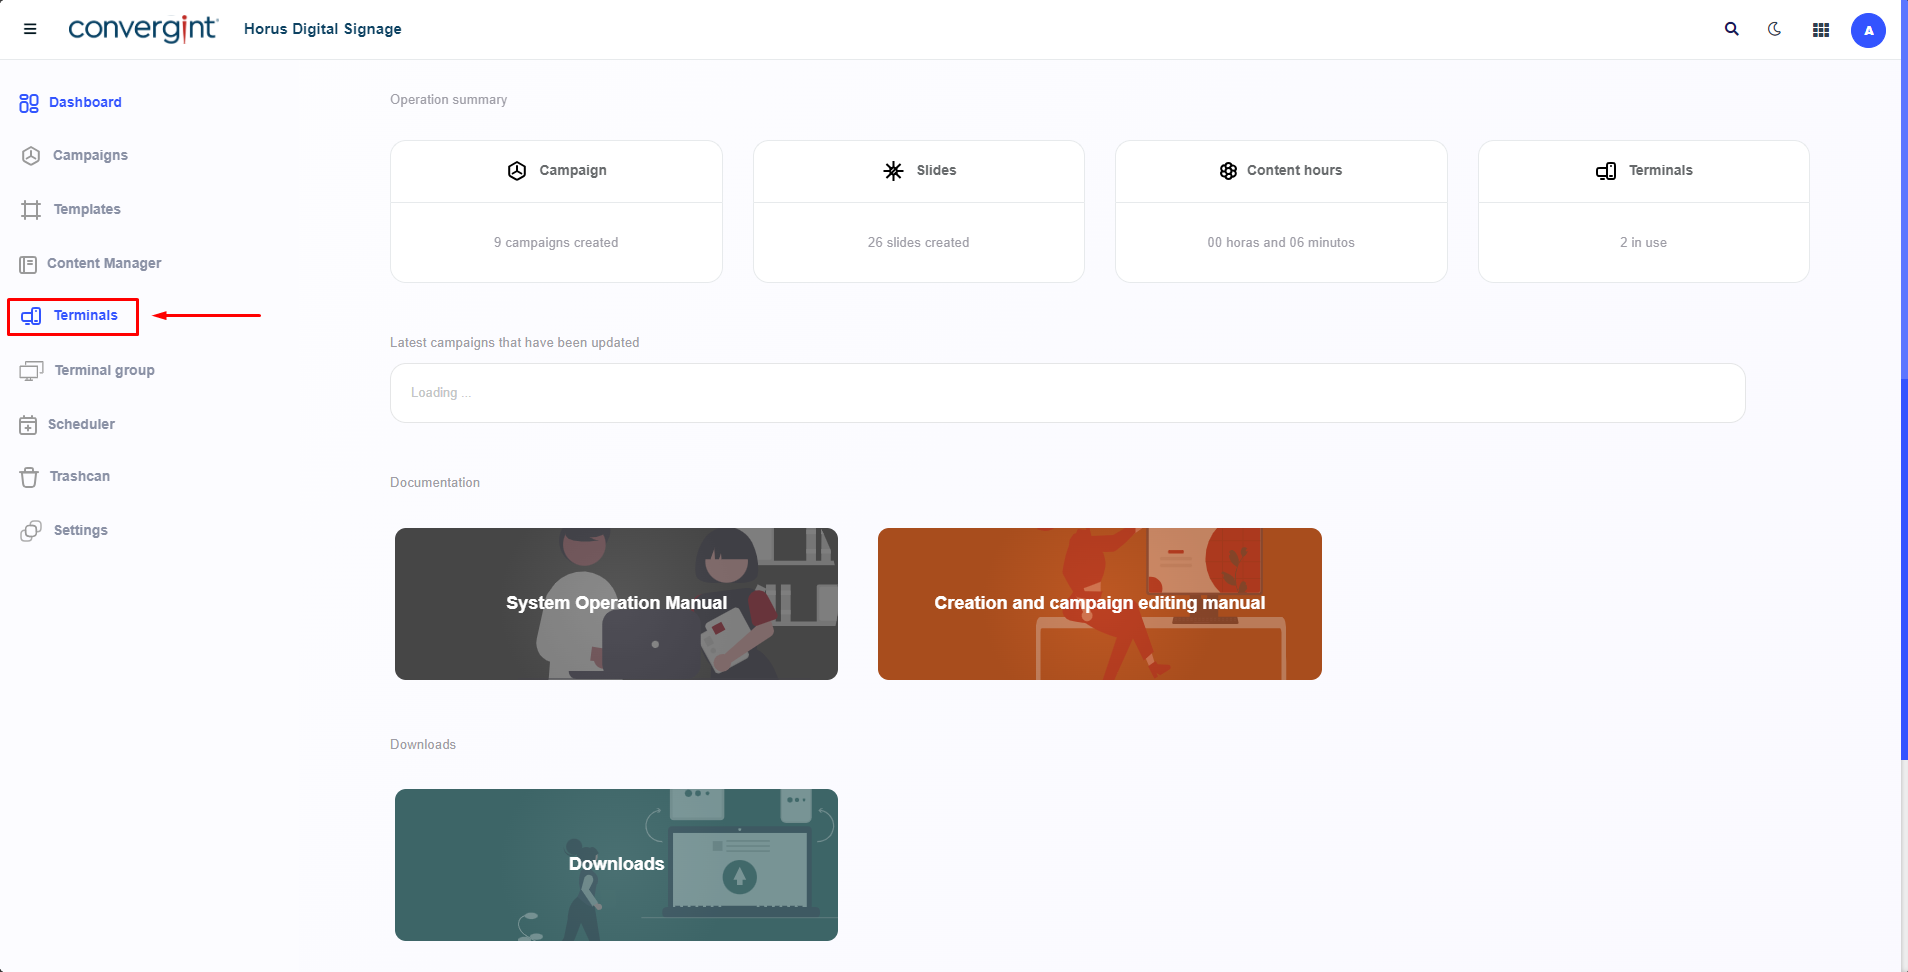
As the first step to register a terminal, access the "Terminals" tab. This function allows you to display Campaign, Scheduler, and Terminal Group within your preferred environment, working in conjunction with the Horus Player.
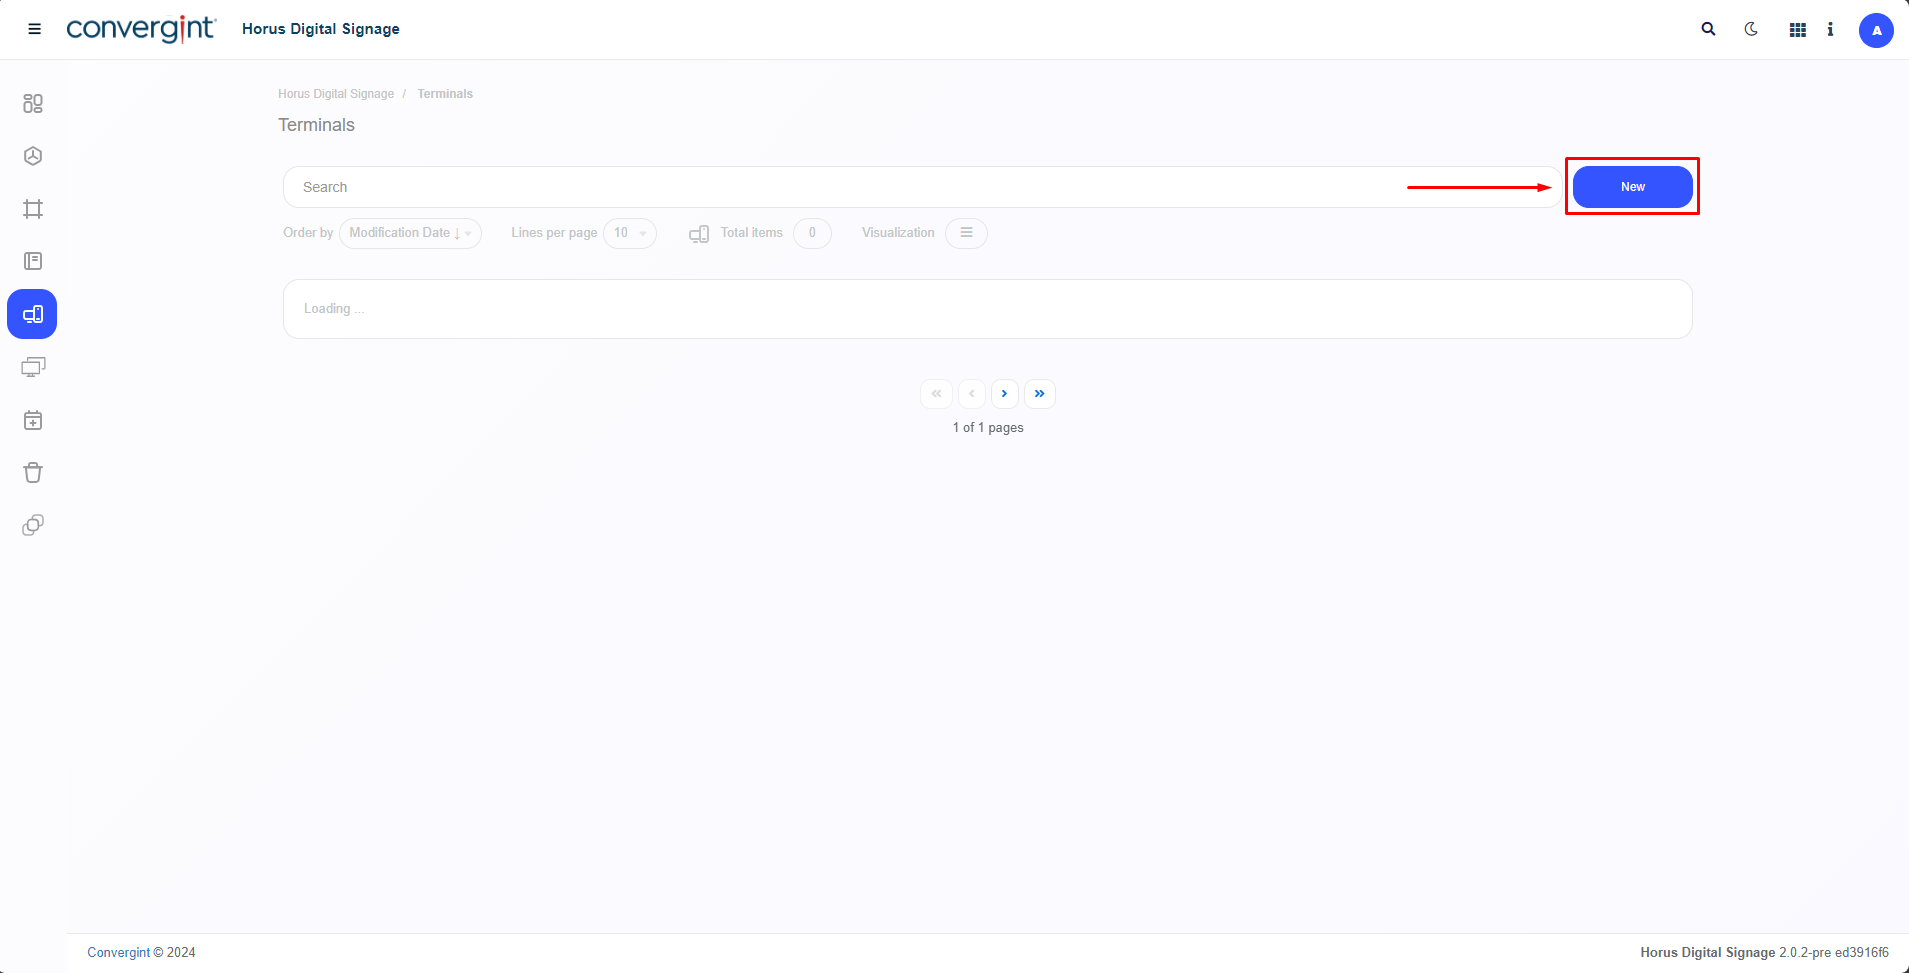
After accessing the "Terminals" tab, the system will open the screen where we will first define by clicking "New." If you already have any previously created terminals, they should be listed just below the search bar.
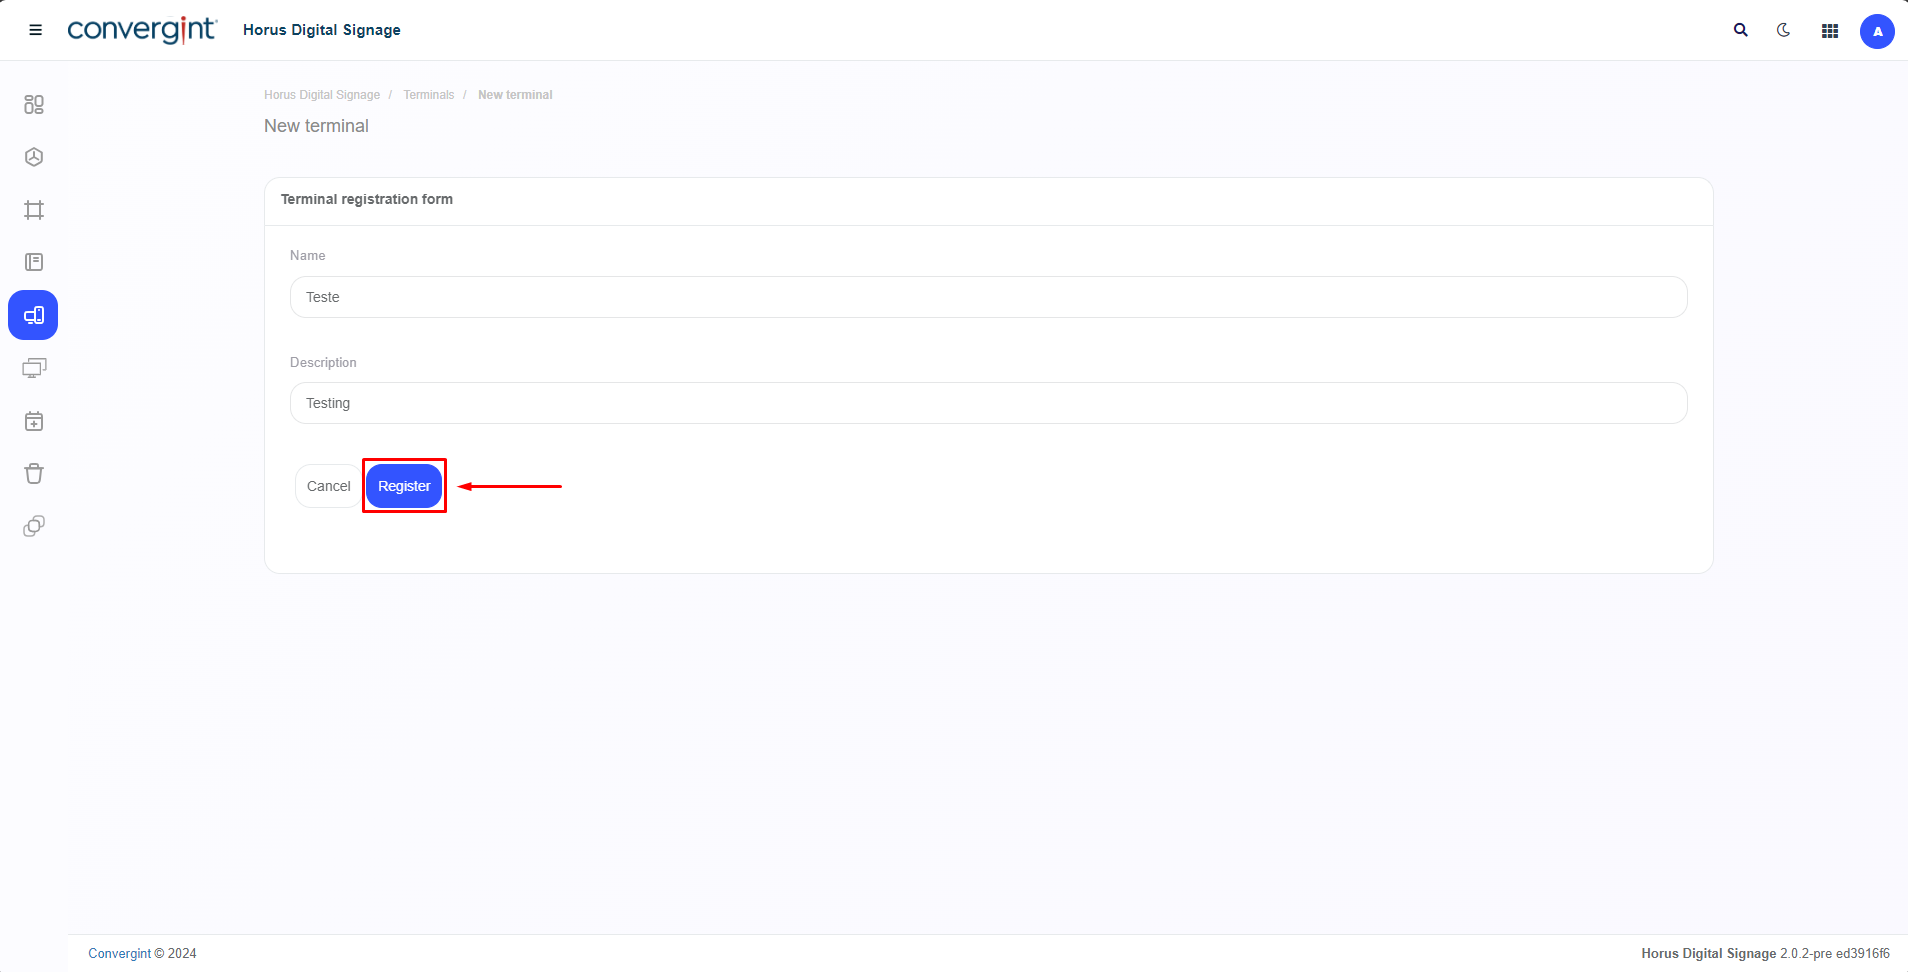
Upon accessing the "New" option, it will be necessary to enter a name for the New Terminal. If a description is needed, there is a field labeled "Description." Then, to create the new Terminal, simply click "Register," thus registering the Terminal with the previously provided details.
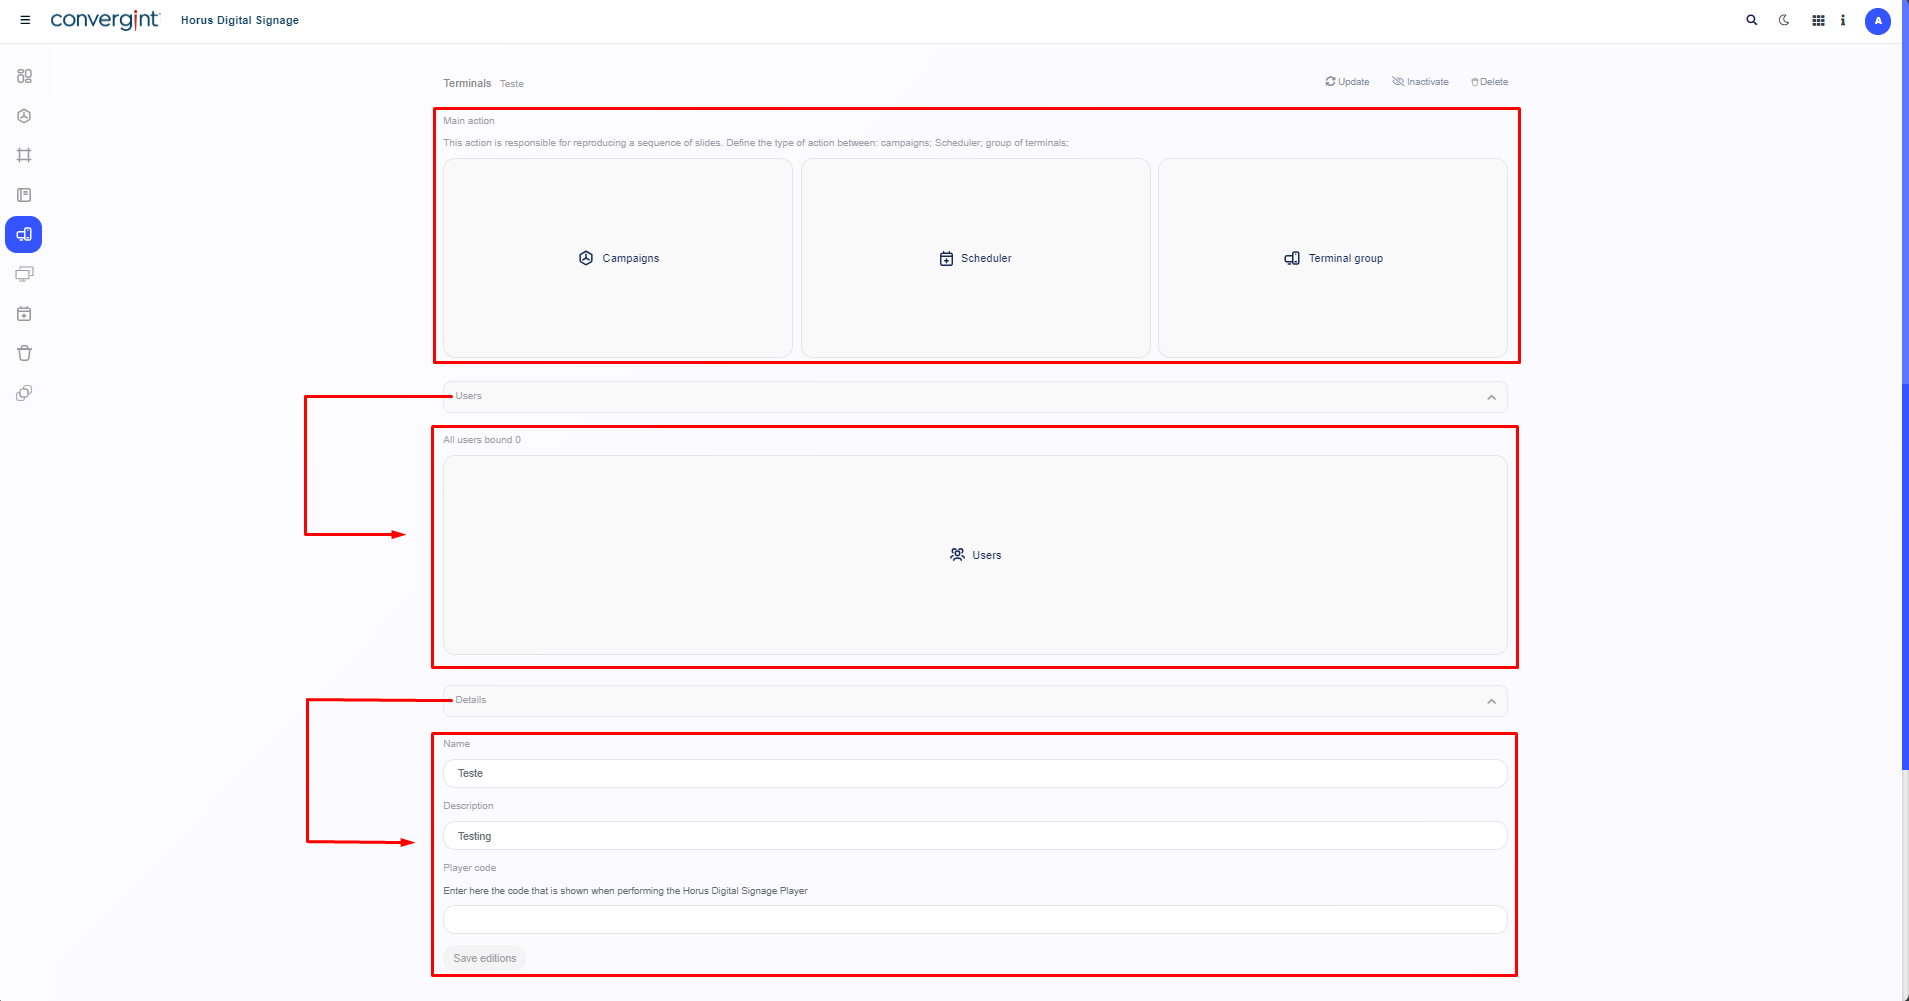
Next, the system will be updated, redirecting to the interface for adding main actions such as Campaign, Scheduler, and Terminal Group, each with its respective functionalities and presentations (slides) according to your preference. Additionally, the system will allow user linking, modification of previously assigned data, and the inclusion and synchronization of the player.