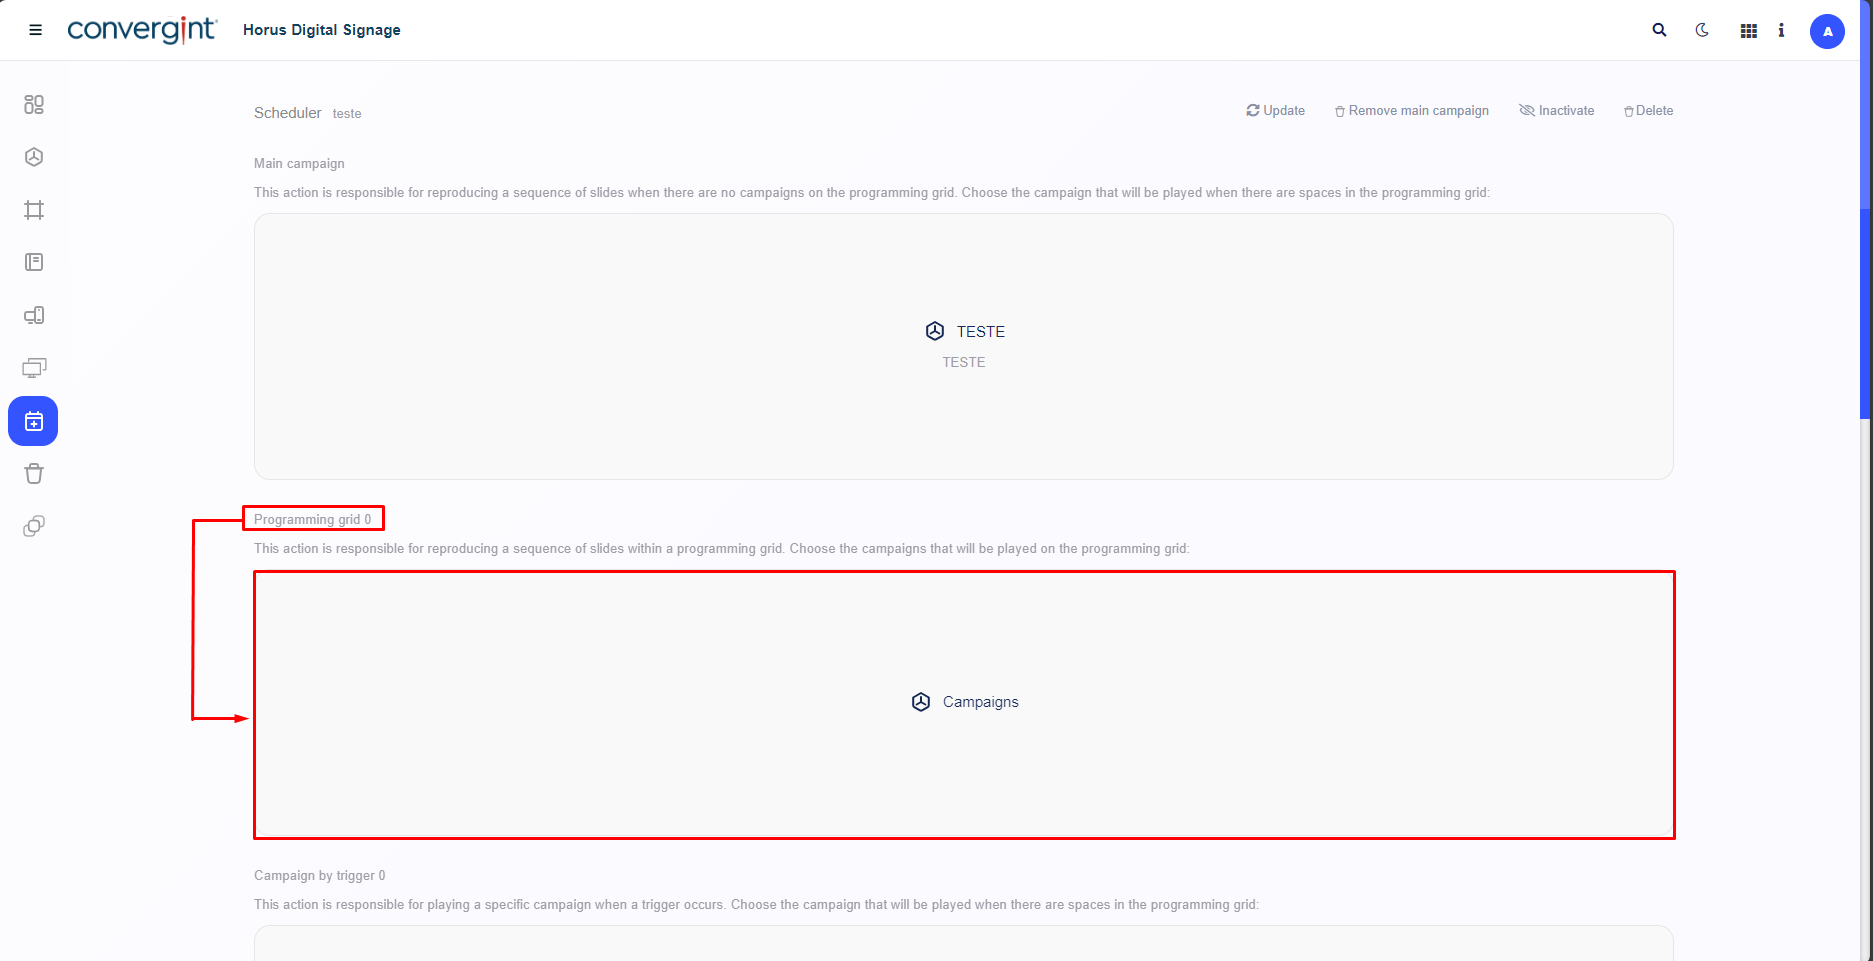
Programming grid
By selecting the highlighted “Campaigns” option, linked to the Programming Grid, it becomes possible to include a Campaign linked to a grid structure. In this functionality, the User has the ability to define a period for displaying each Campaign included. If the defined period is exceeded, the next Slide will be automatically displayed, if it is available for display.
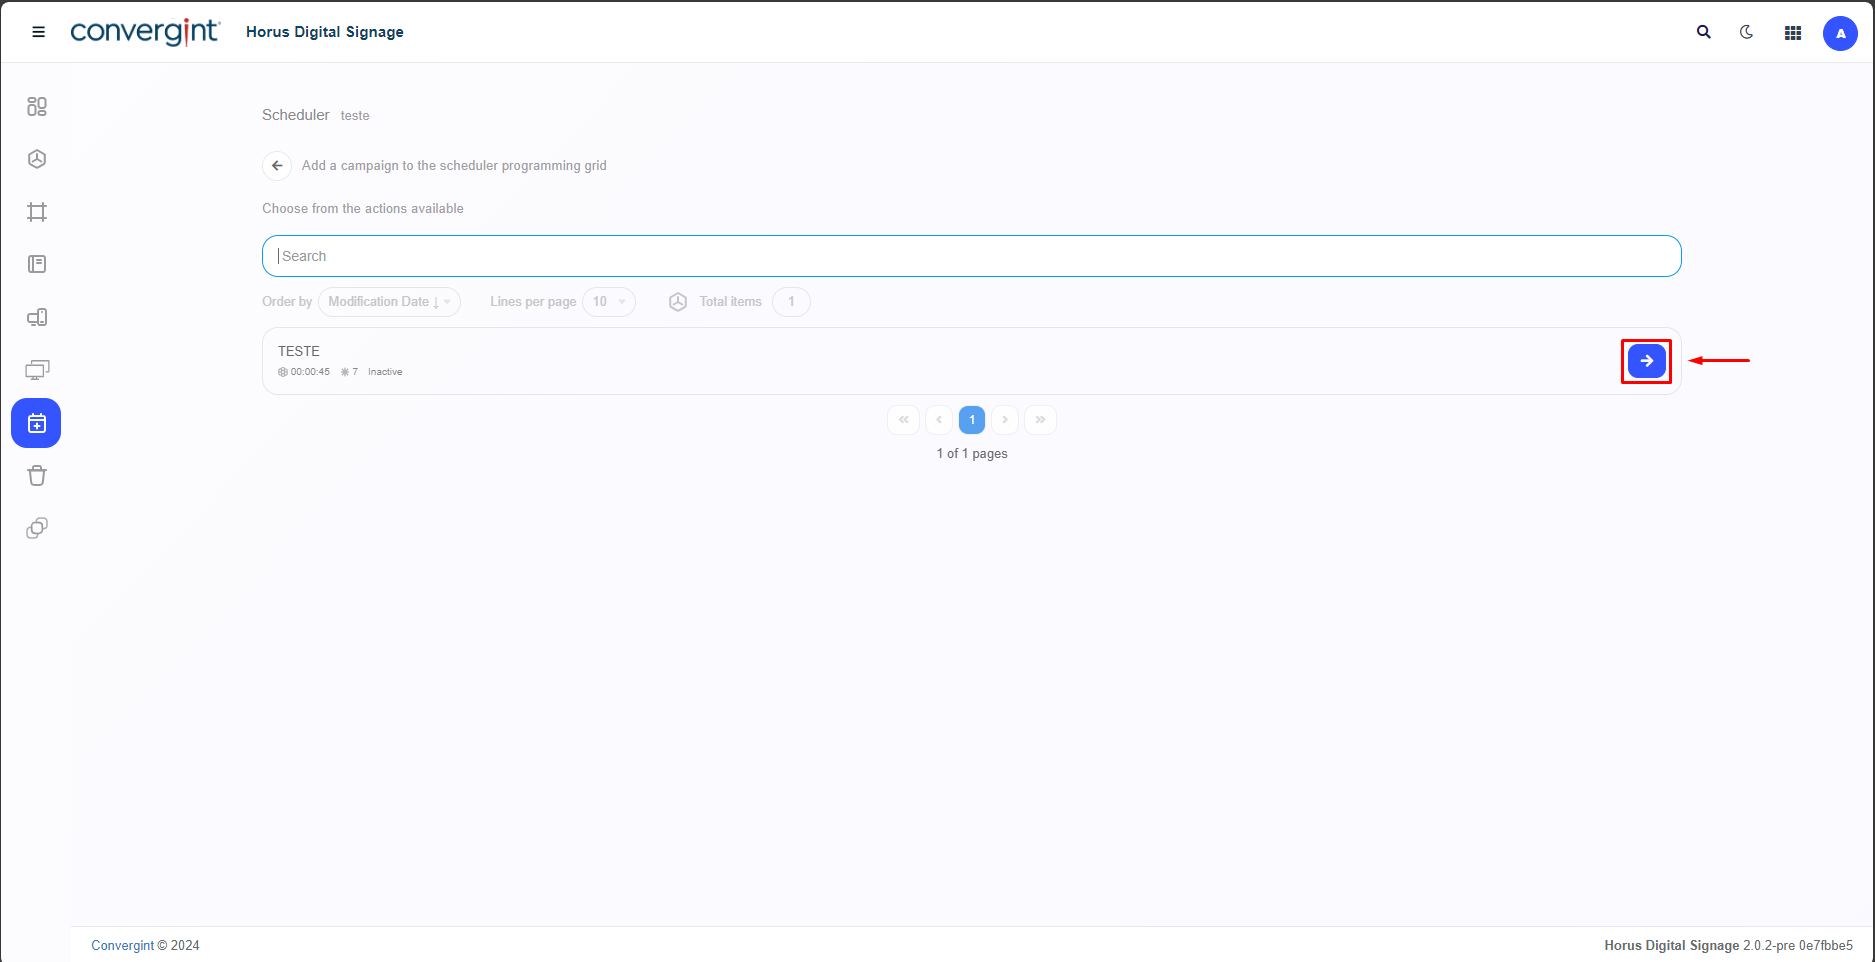
When you click on “Campaigns” marked in the image above, you will need to click “-->”, associated with the Campaign you want. This Campaign must contain the necessary Slide to be configured as a Programming Grid, according to your preference.
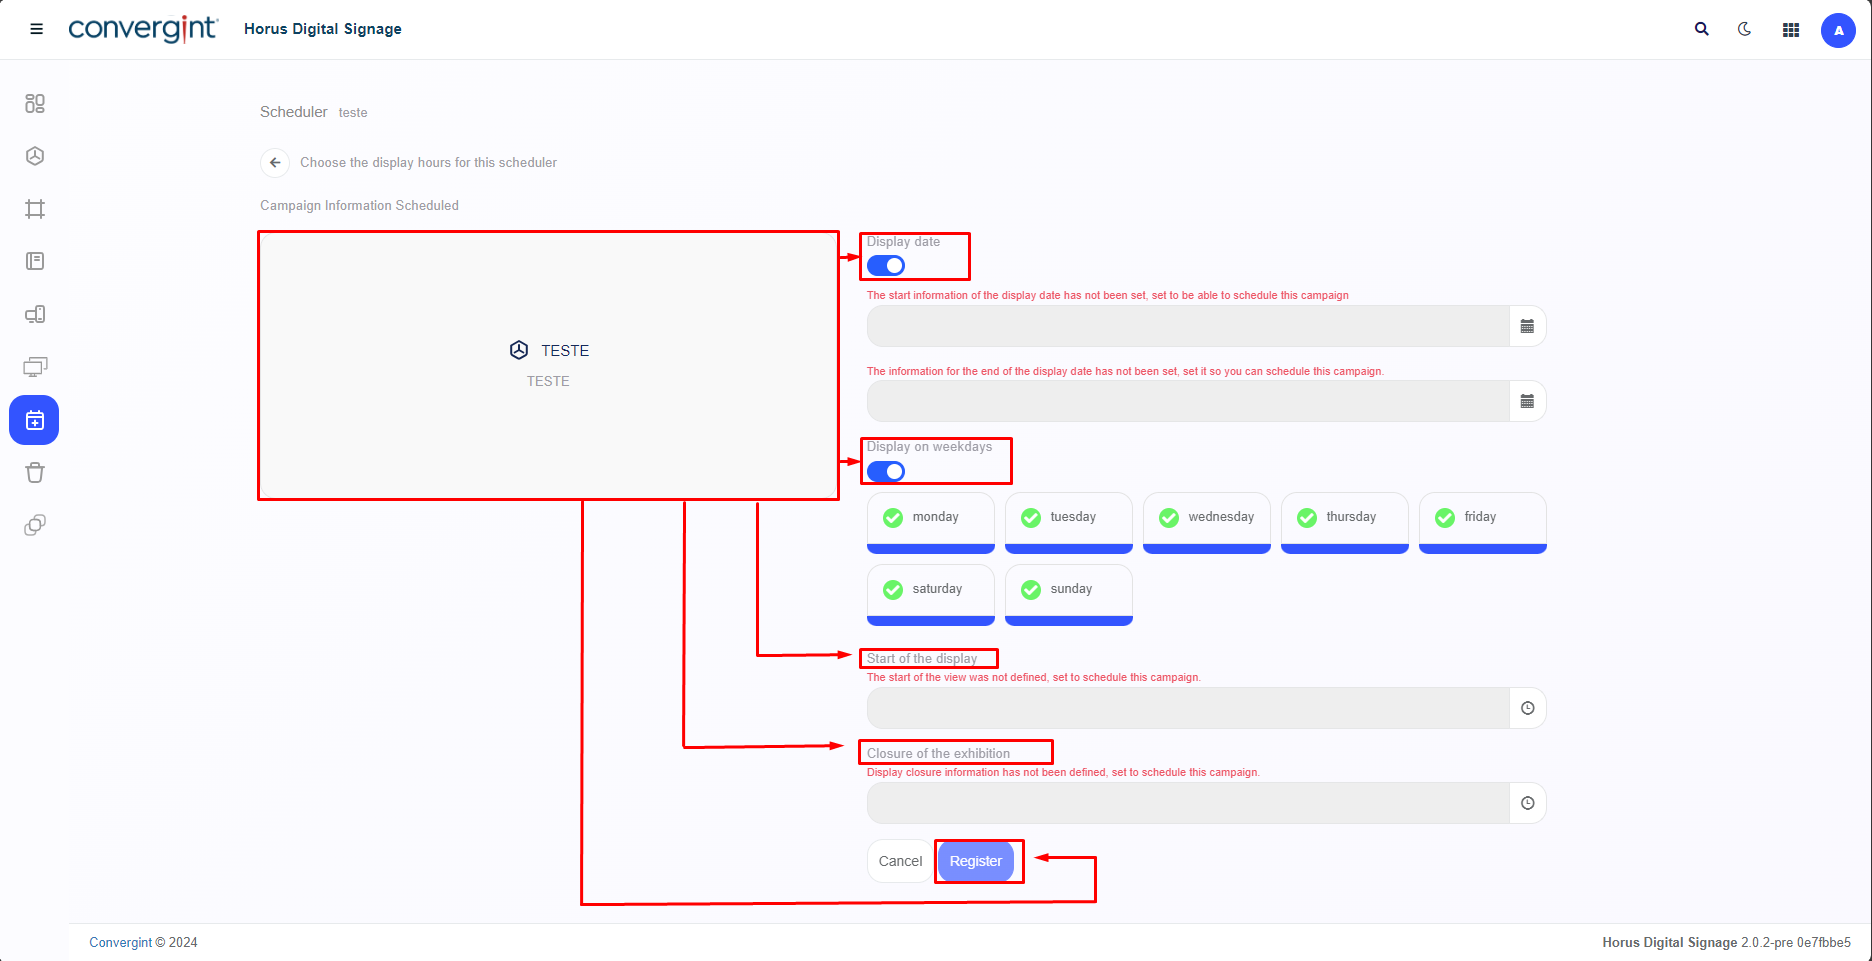
After selecting the Campaign you want, the screen will display several template options. You can use them to define Display date, times and Display on weekdays for the chosen Slide. If you want to include a specific date for the display, you will need to enable the “Display date” option. If you prefer to select the days of the week for the campaign to be displayed, enable the “Display on weekdays” option. After customizing the Campaign display period, click on “Register”.
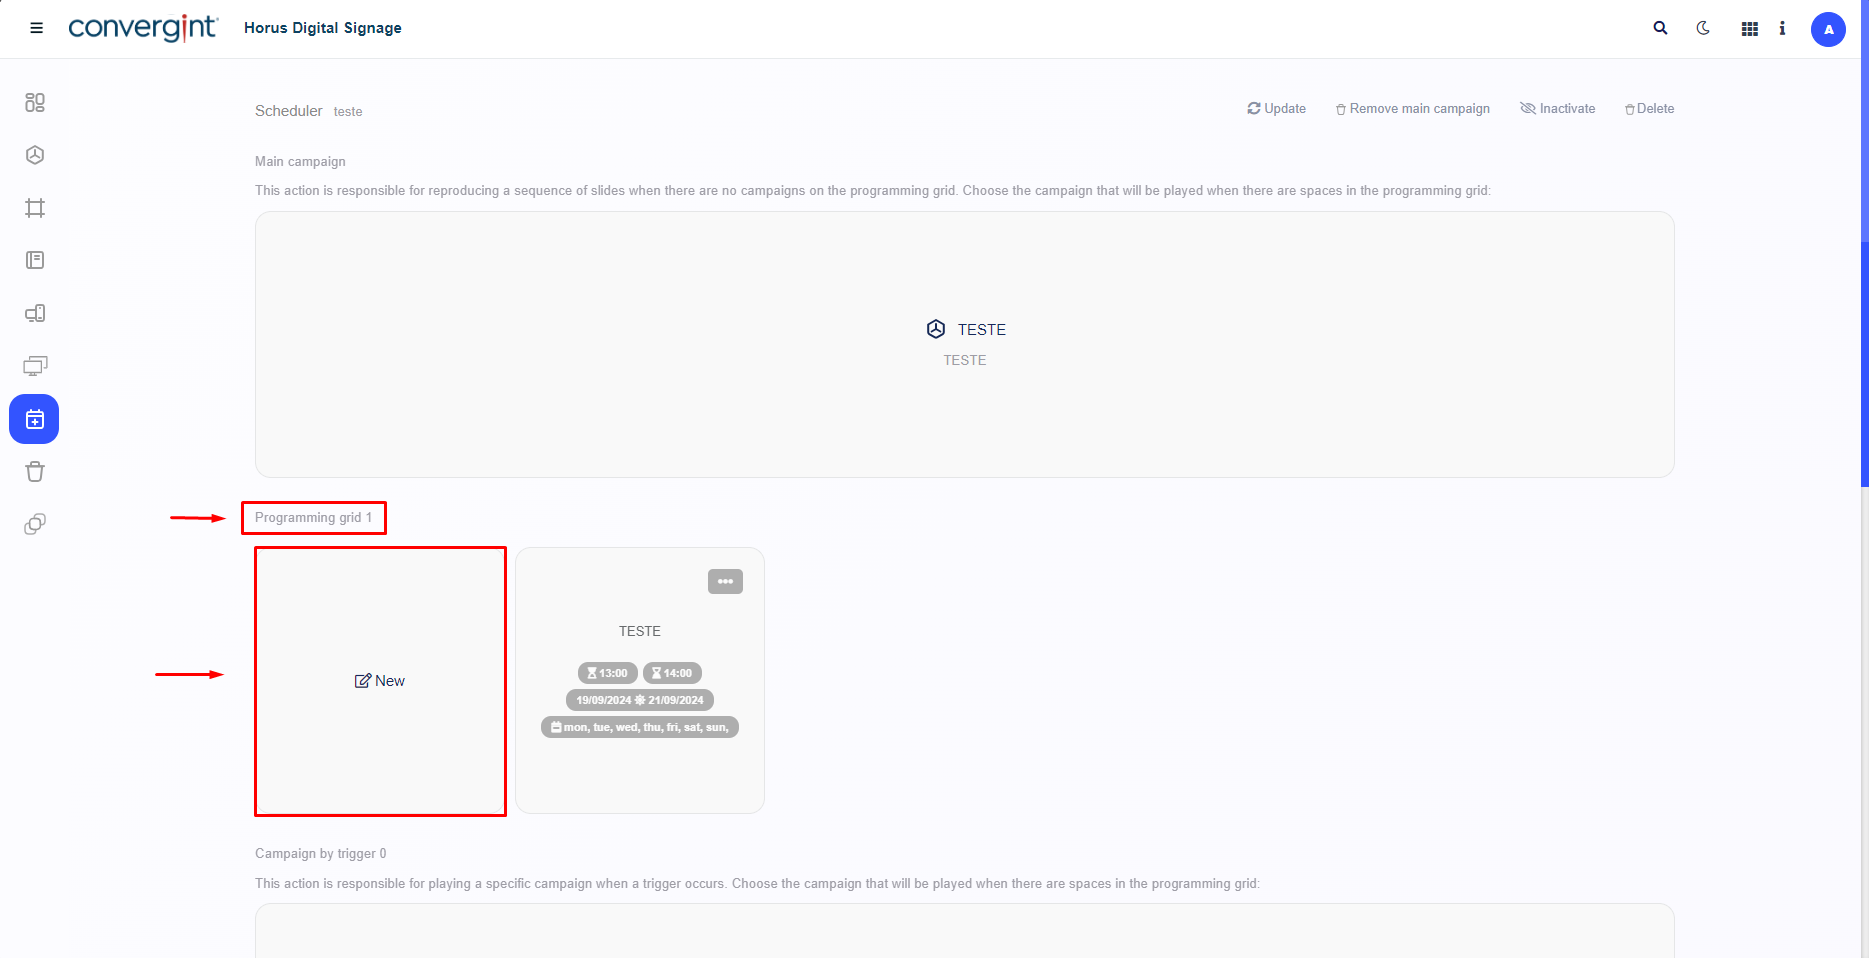
Once you have selected the campaign you want and set the display period according to your preferences, the campaign will be added to the Scheduler in the form of a Programming Grid. To proceed with editing or deleting the campaign previously added to the grid, please click on the “three dots” located next to the campaign. You will find options to edit or delete the campaign.

You can add several Campaigns to the Programming Grid according to your preference by clicking on “New”, then just follow the same steps as above.