Trigger Campaign
By selecting the “Campaigns” button, linked to the Campaign by trigger, it becomes possible to include a Campaign of your choice associated with a Trigger. This will allow the included Campaign to be displayed every time a specific action chosen by the User, such as a Trigger, is triggered.
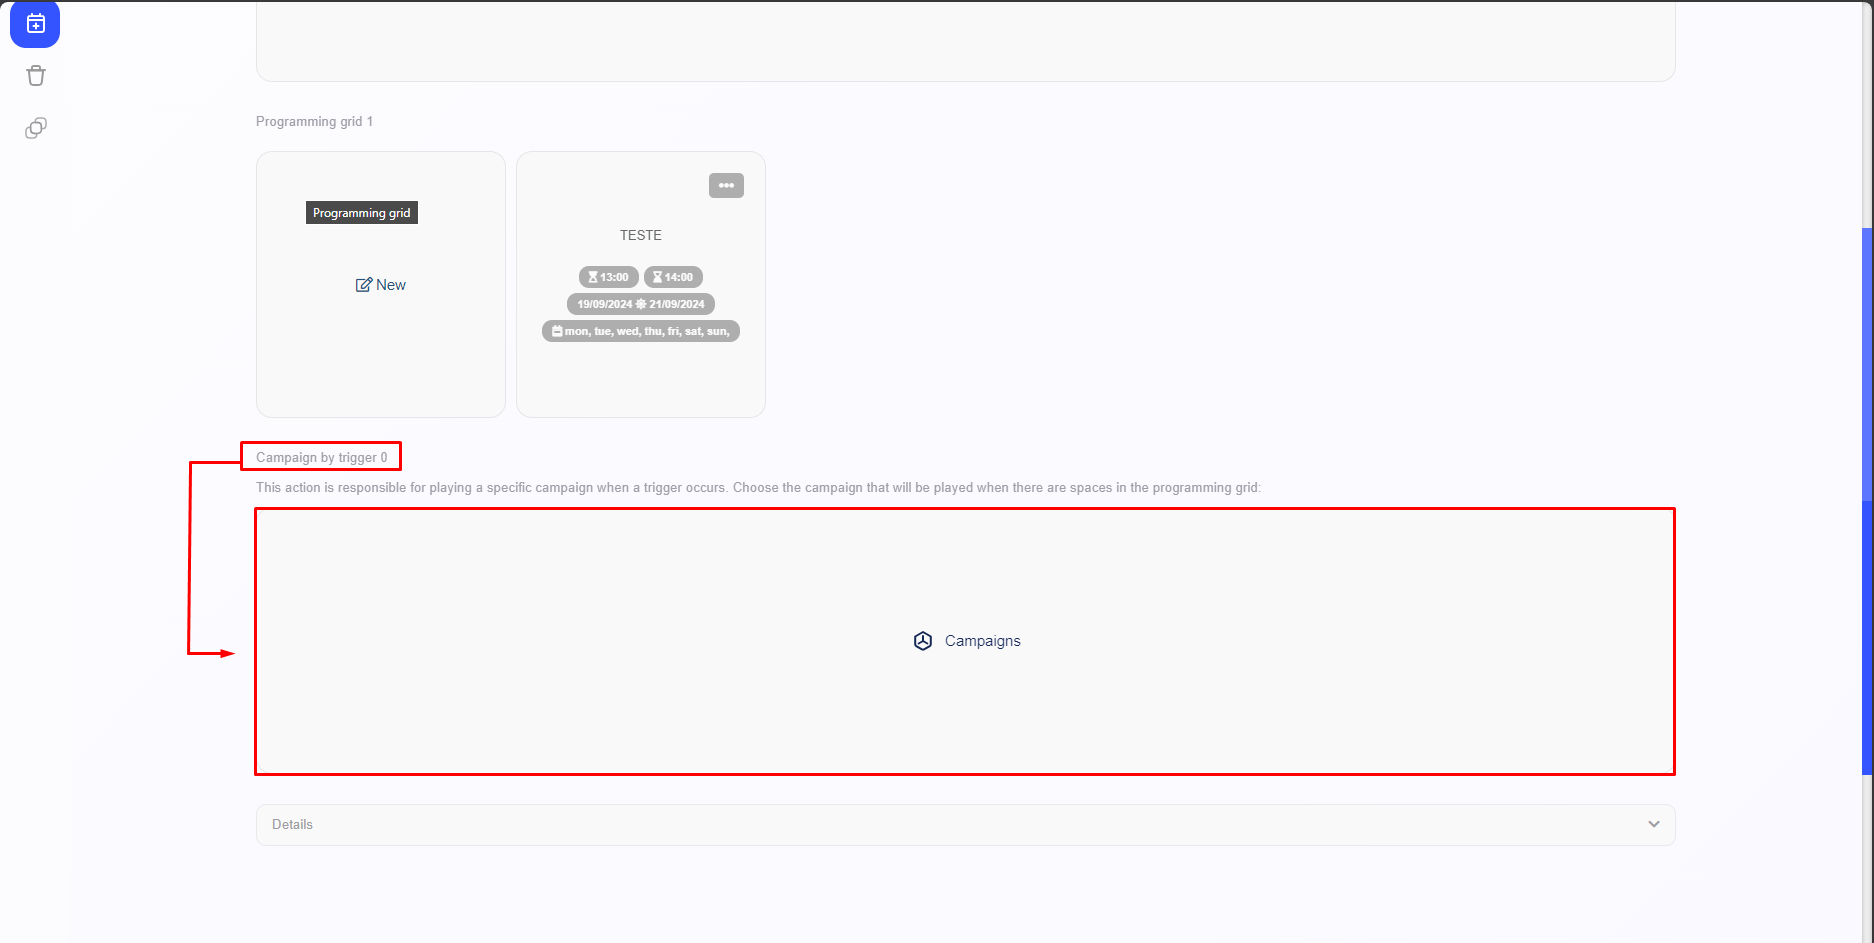
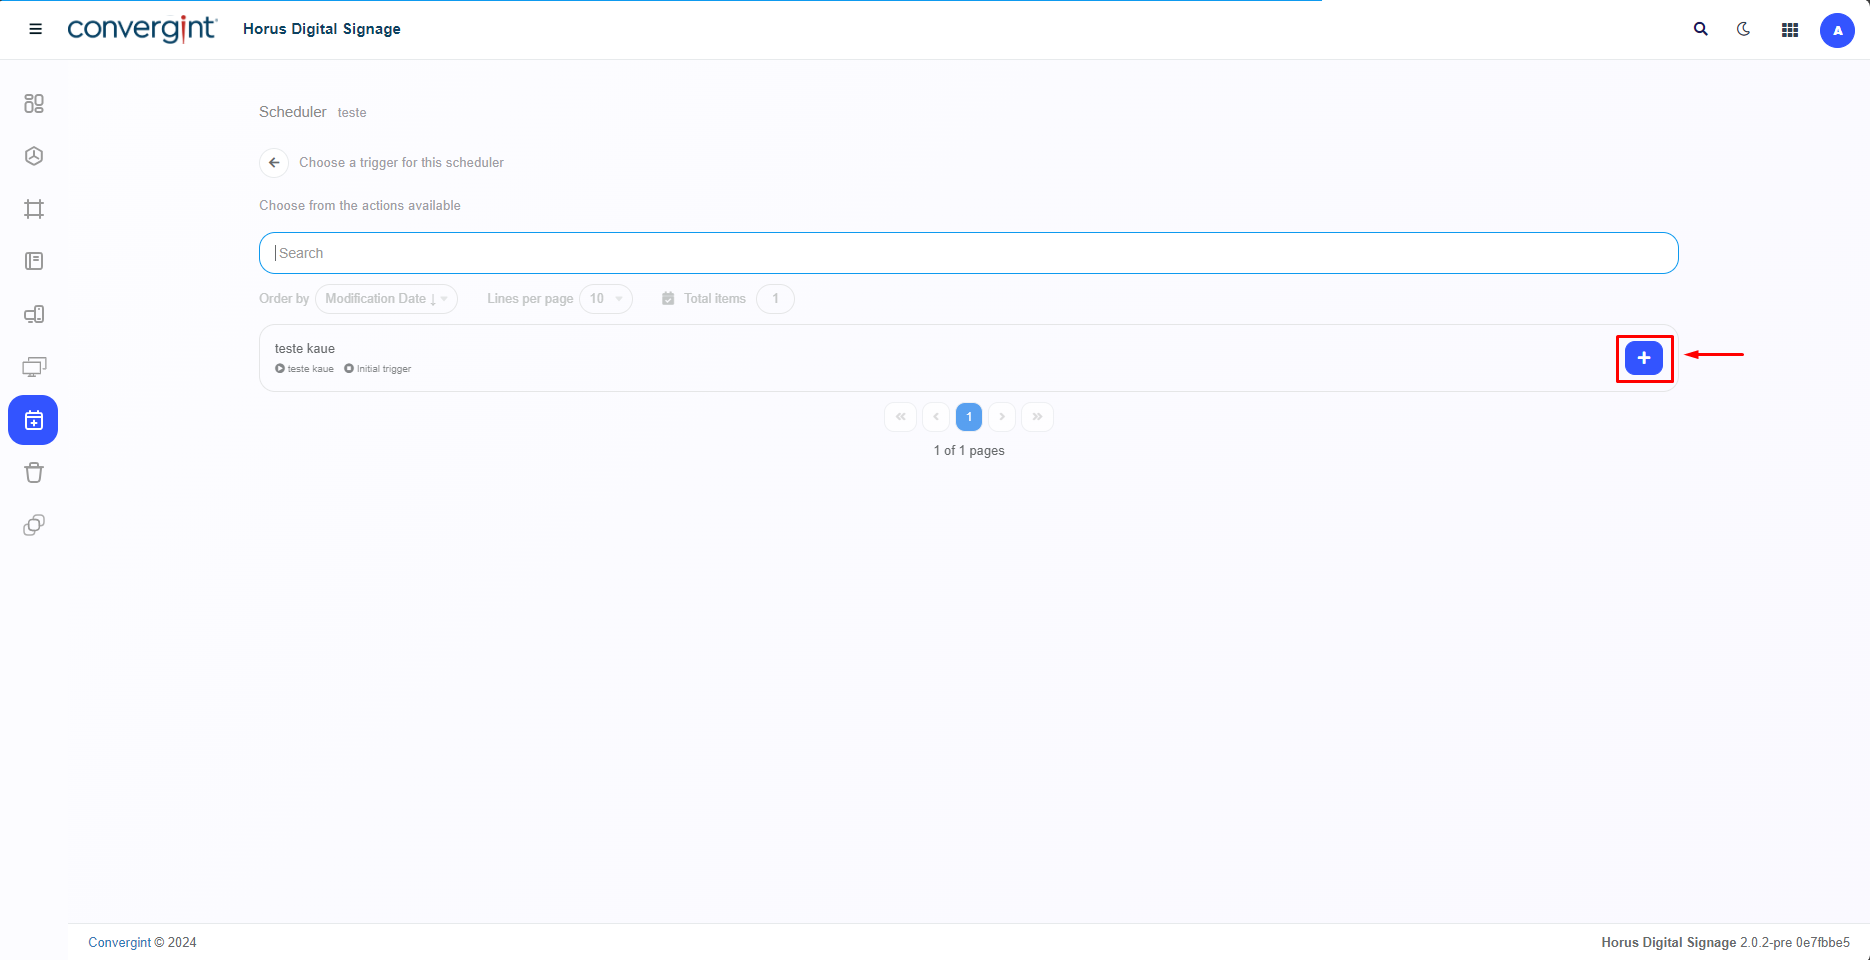
When you click on “Campaigns” in the image above, you'll need to click on the “-->” button associated with the Campaign you want. This Campaign must contain the Slide needed to be associated with the Trigger, according to your preference.

After selecting the Campaign you want, you need to add a previously created Trigger by clicking on “+” (add). If the selected Trigger is triggered, the previously added campaign will be displayed.
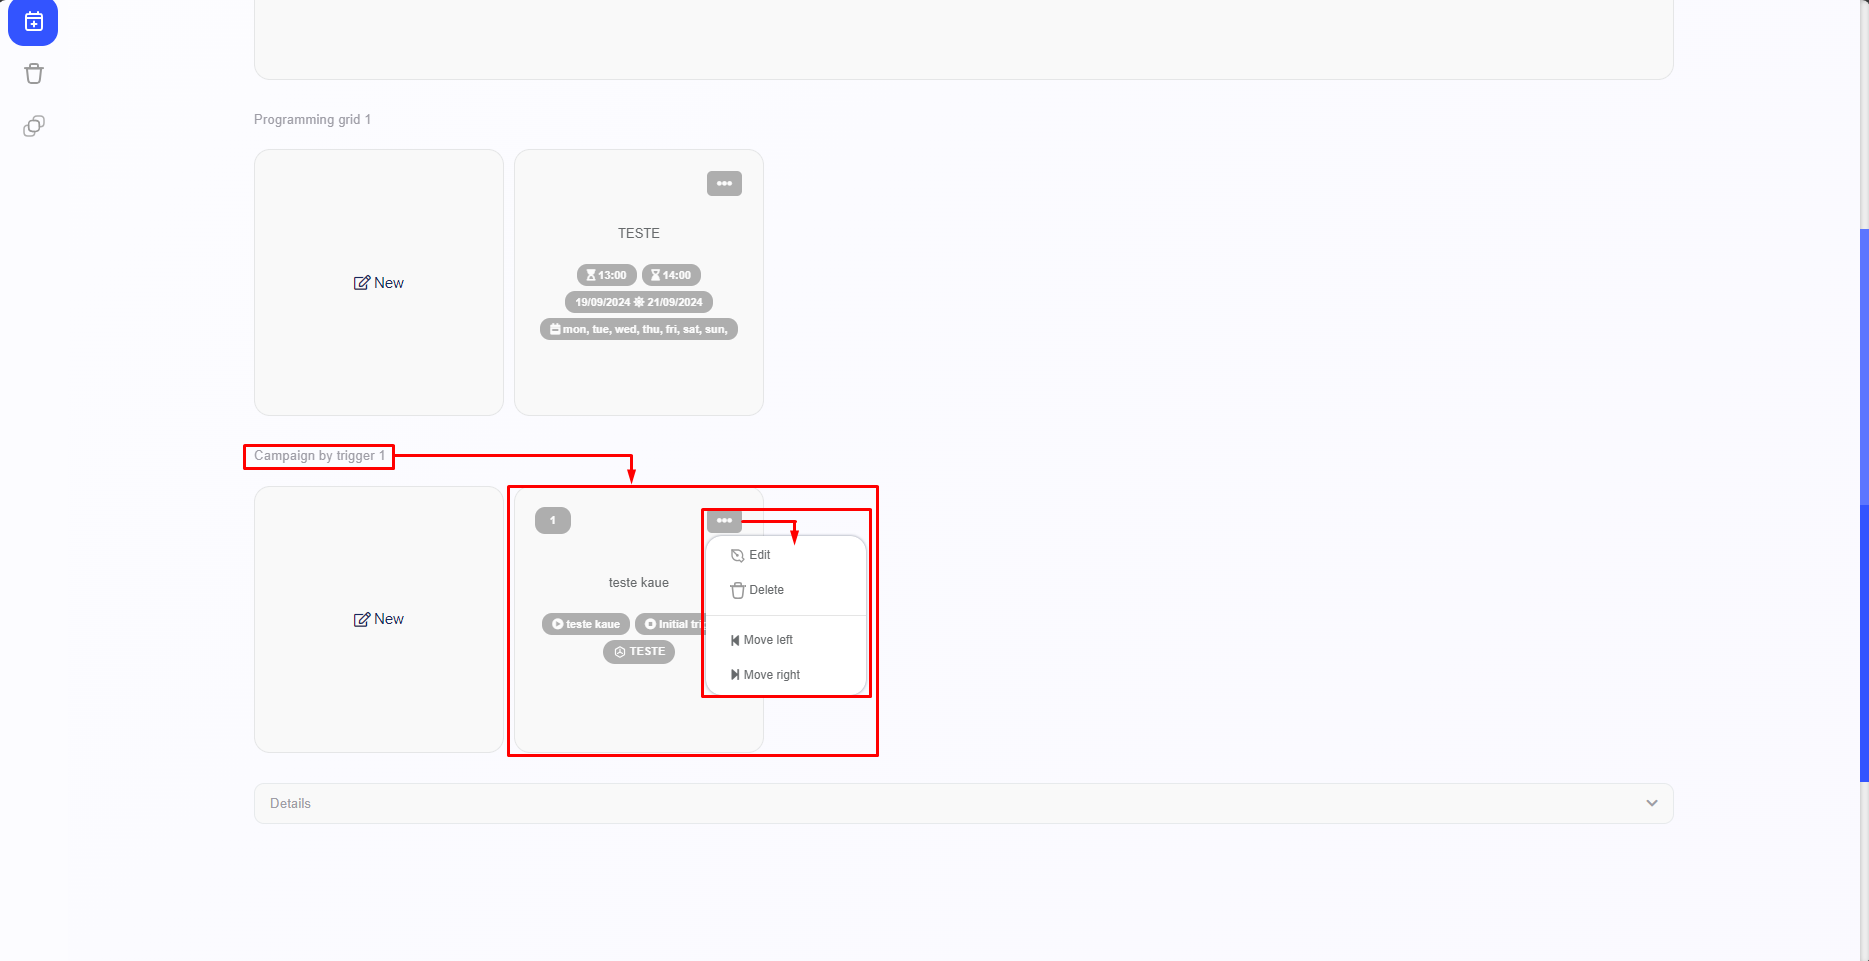
Once you have selected the campaign you want and set the display period according to your preferences, the campaign will be integrated into the Scheduler as a Campaign by trigger. To proceed with editing or deleting the campaign previously added as a Campaign by trigger, please click on the “three dots” next to the campaign. You will find options to edit or delete the campaign, as well as the option to move the campaign left or right.
Note.: For more information on the “Trigger” functionality, go to the “Settings” topic.
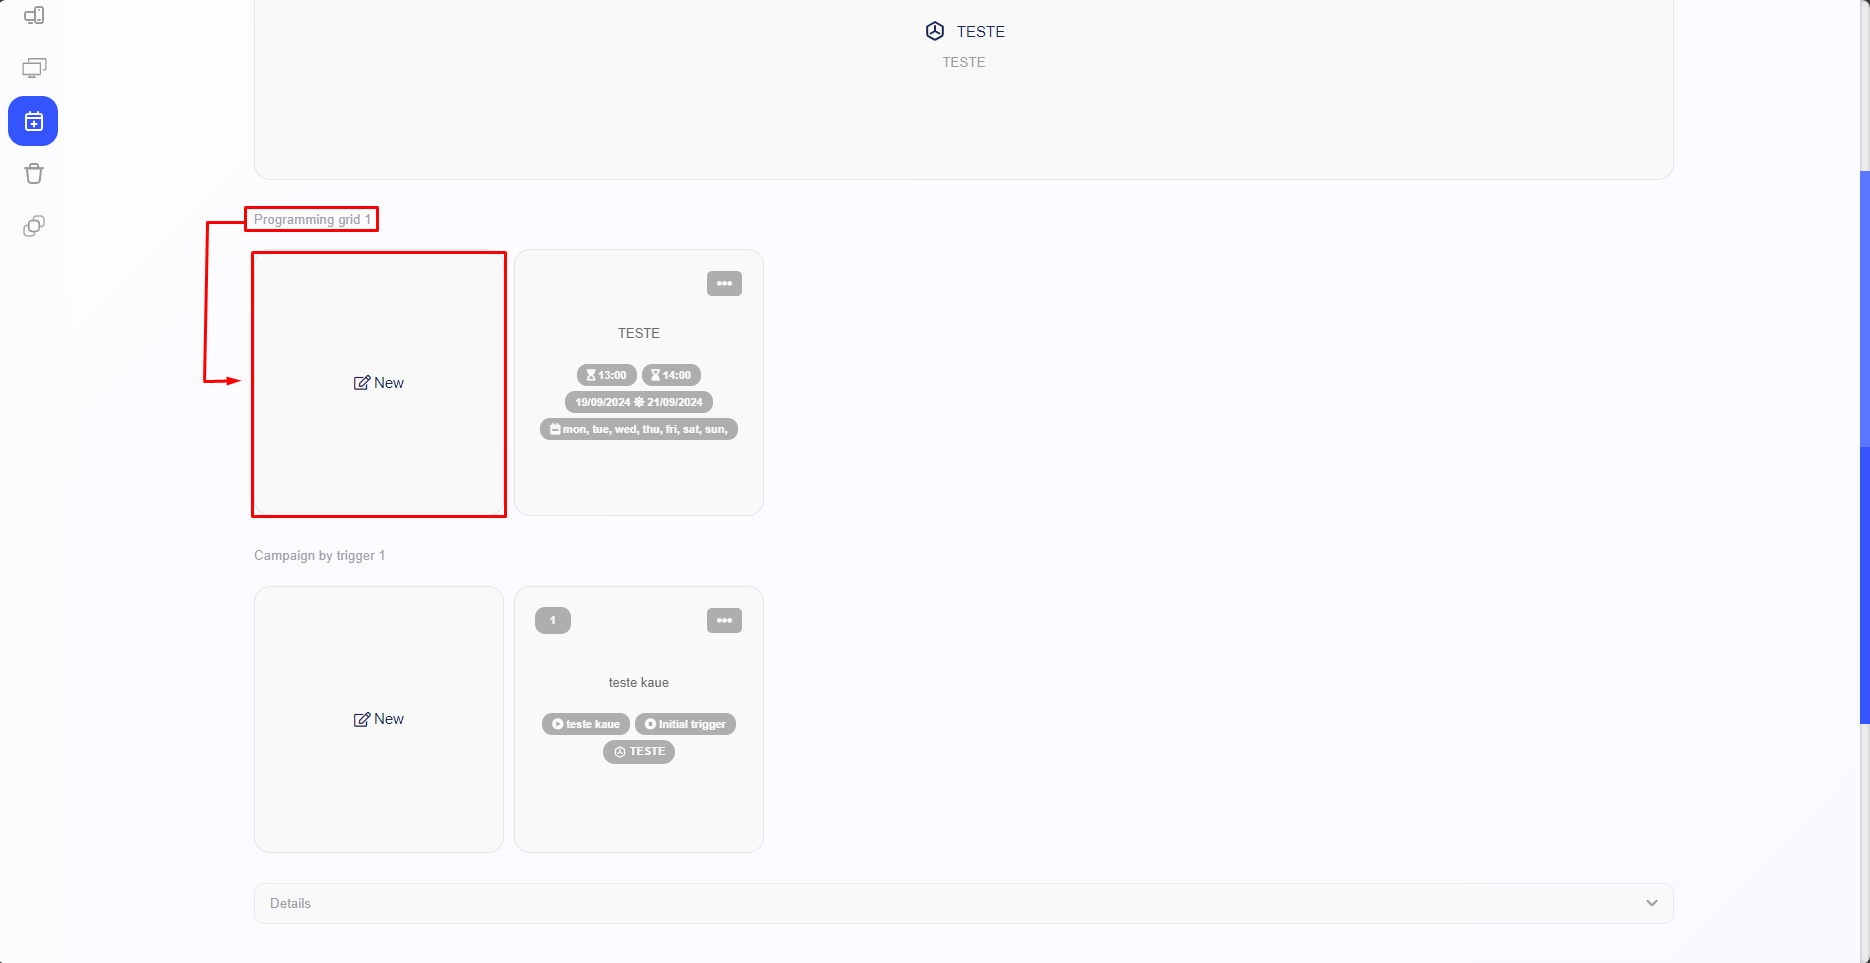
You can add several Campaigns to the Programming grid according to your preference by clicking on “New”, then just follow the same steps as above.